I’ve been trying to figure out the best way to remotely access my Jellyfin server, and after trying port forwarding, I can safely say it’s nowhere near my top five. On paper, all you need to do is open a port on your router and direct incoming traffic to the device running Jellyfin. In practice, you have CGNAT, double NAT, changing public IP addresses, firewall rules, and the security risk of exposing your server to the internet.
There are solutions to some of these problems, but each solution adds something else to configure and maintain. I gave up before I could get the whole setup working properly. I switched to Tailscale instead and remote streaming finally worked.
Port forwarding comes with many challenges
Unable to install at this time

In theory, port forwarding only requires you to select a port to forward to the computer running Jellyfin, and then use a public IP address to connect from anywhere. But it comes with a lot of assumptions. First, you need to control the entire path between the Internet and the server, and it is actively blocked by many residential connections.
Even if you have your control sorted, you still have to deal with the biggest obstacle: CGNAT. An ISP routes multiple customers through a single shared address. Incoming traffic reaches the ISP’s equipment first, and you cannot create a forwarding rule there. You can configure your router perfectly and still get nowhere because the connection never reaches it. The only traditional fix is to request a public IPv4 address from your ISP, which may cost extra or be unavailable.
You also have to deal with the problem of Double NAT, which usually happens when your ISP-supplied modem also acts as a router and you connect your own router behind it. Both devices perform NAT, so forwarding the port to only one does nothing. You need access to two routers, separate rules for each layer, or bridge mode on your ISP equipment.
Overcoming these problems still requires several pieces. The media server needs a local IP address stored so that the forwarding rule does not point to the wrong device. Most home connections also use dynamic public IP addresses, so you’ll need dynamic DNS to store a reliable address for Jellyfin.
Tailscale handles remote access much better
It comes with much less requirements
Tailscale eliminates almost all of the problems you face with port forwarding. It creates a private network between the Jellyfin server and the devices you use to stream. Both devices connect to the same network and Tailscale uses WireGuard to encrypt the traffic between them. Jellyfin remains accessible to my pinned devices without exposing the login page or streaming port to the public internet.
Each device also receives a permanent Tailscale IP address that remains the same even when the underlying network changes. You can also use MagicDNS to replace that IP address with an easier-to-remember server hostname.
Tailscale attempts to establish a direct peer-to-peer connection between the streaming device and the server. Once this connection is established, the media moves directly between the two devices instead of going through a regular VPN server. This reduces latency and allows Jellyfin to take advantage of the upload speeds available from your home connection. If a restricted NAT or firewall prevents a direct connection, Tailscale can fall back to a peer-to-peer relay or one of its DERP relay servers.
Setting Tailscale with Jellyfin
It certainly takes less time than setting up port forwarding

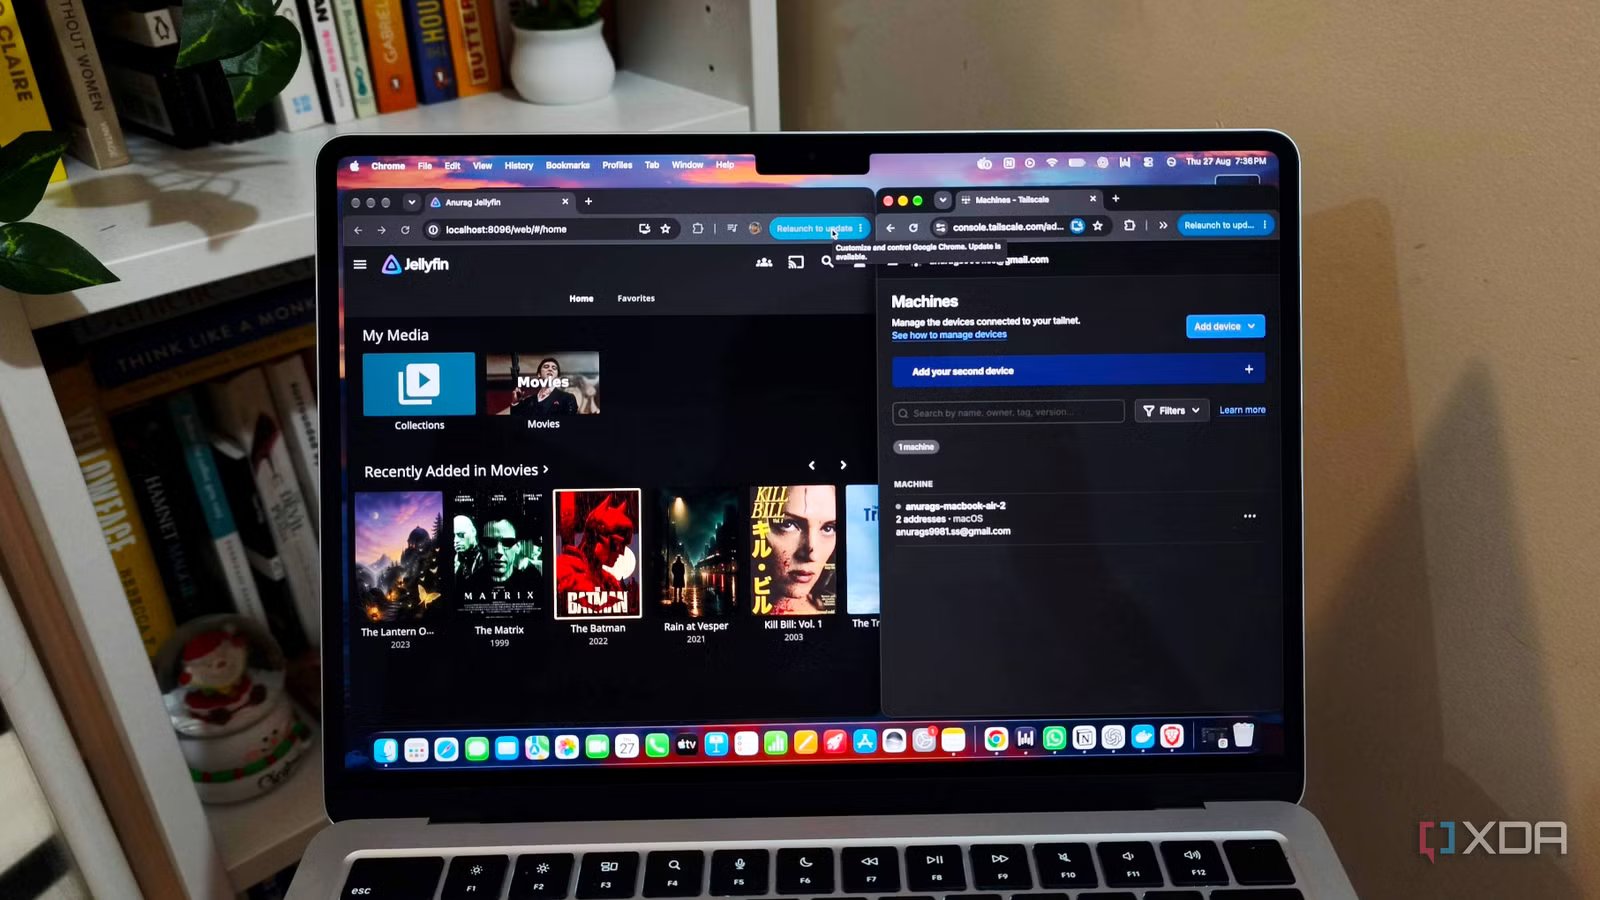
I installed Tailscale on the NAS running my Jellyfin server and logged in with my Tailscale account. Adding a server to a tailnet on Linux requires running sudo tailscale up after installation. Windows and macOS manage this with the Tailscale app. Once connected, the server will appear under Machines in the Tailscale admin console with a private IP address starting with 100.
Jellyfin does not require a plugin or special integration. The only setting worth checking is Allow remote connections to this server under Control Panel > Networking. Jellyfin has a remote access permission for individual users, so it should remain enabled for an account used outside the home.
The next part takes place on the playback device. I installed Tailscale on my phone and streaming device, logged into that tailnet and turned it on. Tailscale currently has clients for Android, iOS, Windows, macOS, Linux, Apple TV, and Amazon Fire devices. Android TV devices can use the Android app available through Google Play.
Inside Jellyfin, I added the server using the Tailscale address followed by the Jellyfin port, eg http://100.xxx:8096. You do not need to configure an exit node, subnet router, Tailscale sink, or reverse proxy for this setup. Both the Jellyfin server and the playback device must be connected to the same network. Tailscale usually starts automatically from the server, so the connection is restored after a reboot without having to do anything again.